How to finish my printed horn
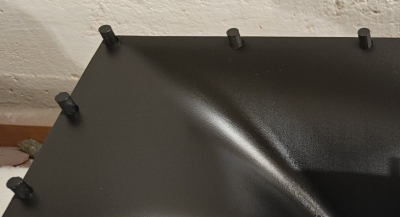
Raw state of surface
AudioHorn PLA part are printed with the most precisely and finest way as possible, in black matt, so most users use it raw without painting.
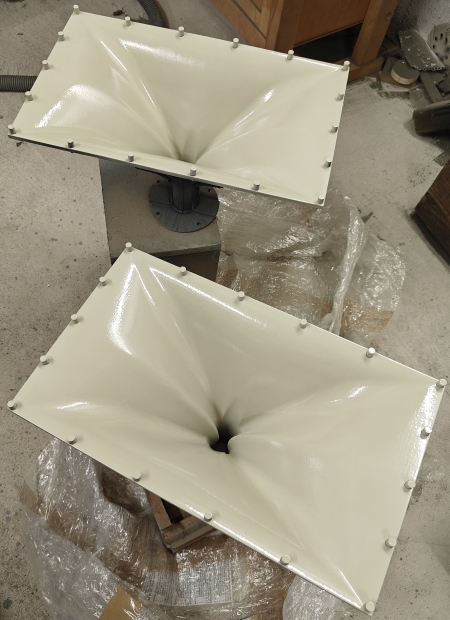
For big ones like X-Shape 33 and 40 cm that are in two pieces, it can be interesting to paint it.
Warning and Disclaimer
Drying your painted speakers or horns at excessively high temperatures or/and use of incompatible products can irreversibly damage them.
Unlike car bodies, which are typically made of separate, non-glued parts that can expand or move under high temperatures and are often painted with 2K paints designed to cure chemically and withstand such heat,
speakers and horns are complex, glued, hermetic assemblies made of various materials, including different types of wood, printed parts, and adhesives. These components expand and contract differently when exposed to heat.
Rapid artificial drying can cause:
-
Deformation: Warping and distortion of the speaker or horn.
-
Cracking: Damage to the glue joints between piece of woods, resulting in paint cracks at joints, which may appear immediately or several months after the painting process.
Professional painters who specialize in audio equipment use controlled drying processes tailored to the specific materials and thickness of each component. Over-drying is a common mistake with severe consequences.
We strongly advise against using high temperatures to speed up the drying process, including direct sun. Proper drying conditions are essential for the longevity and performance of your speakers or horns.
Traditional 1K painting are design to dry at temperatures around 20/25°C, 30°C maximum, while some car parts are dried at much higher temperatures (60-70°C), often with 2K paint design for.
Professional audio painters typically use short, controlled drying times based on the paint or/and varnish thickness and chemical properties.
To minimize the risk of cracking, we also recommend using primer and paint from the same brand.
If you are unsure about the correct drying process, please consult a professional painter with experience in audio equipment or follow our guidelines.
Protect your investment by following recommended drying procedures. AudioHorn cannot be held responsible for damage caused by improper drying methods.
For applications requiring extreme conditions, please contact us to discuss alternative materials.
1. Coating and first sanding
Most of our horns are already sanded to 180P, and, where surface imperfections are too pronounced for spray putty, they are filled with Motip Mastic Repair Putty.
2. Protect
Don’t forget to protect the hole screw with a false screw in PLA or screw that you will not use, otherwise you will not be able to use the screw’s hole at the end of the entire process.
You can ask us to provide it.
Protect yourself also with real mask like the AirGearPro M-500 or others, even when sanding raw PLA if possible.
3. Spray Putty
Even if the printed horn is provided already sanded at 150/220p, it’s better to sand it a little again and remove dust to be sure to have a perfect surface just before Motip Spray Putty usage.
Then we need to sand it, it can need several layer/sand operations, at least 3 repetition of it is needed to completely remove print lines.
The sanding beetween each layer can be done at 180P and the last one before primer arround 400P or even more, Spray Putty is made to be sanded, it’s not hard and doesn’t provide a good adhesion for paint.
You can sand with these sanding sponges, without water:
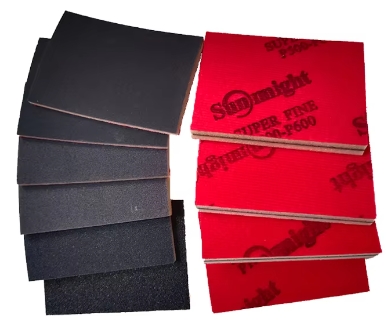
They can be cleaned with water and liquid soap.
The final sanding, after at least three layers, can be done incrementally from 180 to 800/1000P to reduce the work required in the next step.
4. Primer and sand
We will use here a “Filler” as the Motip Filler, also call “high build primer” that will allow a better paint adhesion, we switch on this step only if the state of surface is perfect thanks to the previous step.
Sand the primer when it’s dry, use 400P minimum and usually 800P/1000P to 3000P grain by hand.
Prefer to make tiny layers of filling primer then sand then put another layer then send again rather than put too much of filling primer in one shot.
The state of the surface must be perfect at the end here.
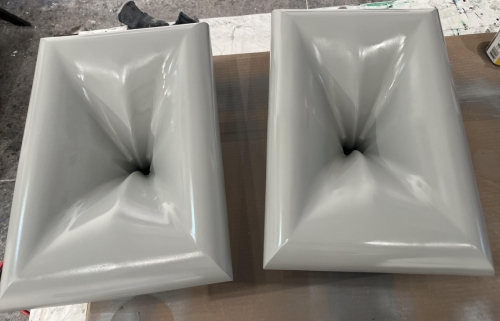
5. Paint
Use a paint by following brand instructions, use the same brand than the primer to avoid bad chemical reactions 6 or 12 months later, a chemical reaction between primer and paint too different can have a result as cracks then falling paint months or years after.
Paint it with a tiny layer, with a regular aerosol paint.
2 or 3 fine layers should be enough , normally you don’t need to sand after the first one but if you see a default don’t hesitate to sand again when it’s dry.
6. Varnish Protection
Still in the same brand use single-component aerosol varnish to protect your paint when it’s dry.
- Motip Clear Varnish Matt
Dry
In every step, let product dry itself to official time and condition given by the brand, do NOT try to speed up it artificially in any manear.
Professional speed-up dryng in audio is done in a very controled and different way than car body parts, according to material, products used, thickness… See disclaimer section for more informations about it.
Warning about drying outside in direct sunlight: 1K paints are designed to dry at 25–30 °C. In direct sun, a black horn can reach 80–90 °C. Beyond the risk of dust contamination, such heat can cause 1K paints to crack or lose adhesion. While PLA offers the best torsional strength for indoor use (cf. PRUSA test), prolonged outdoor exposure to very high temperatures in direct sunlight is not recommended. If outdoor use is required, other filament types can be used.
![]()